Creating an EPAF in Lobo Web
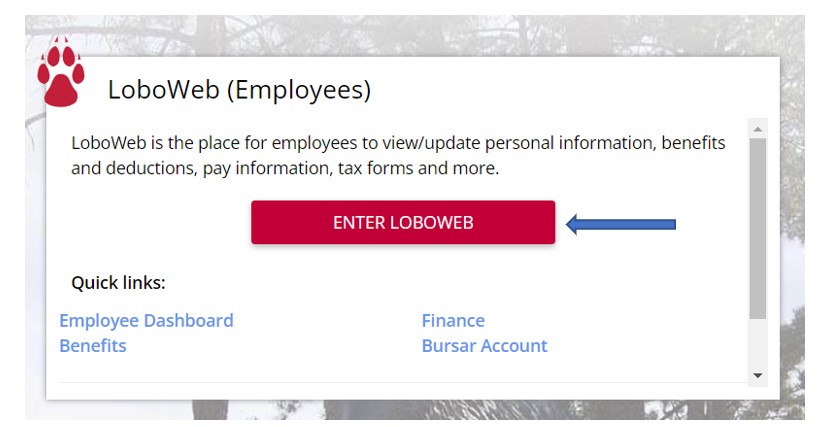
1. Log on to my.unm.edu.
2. Select "Enter LoboWeb."
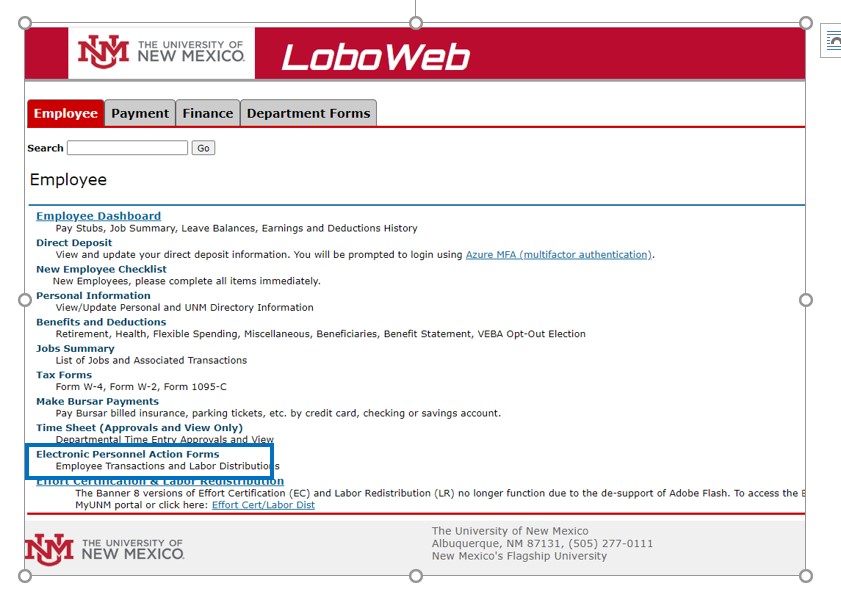
3. Select Electronic Personnel Action Forms.
4. Select New EPAF.
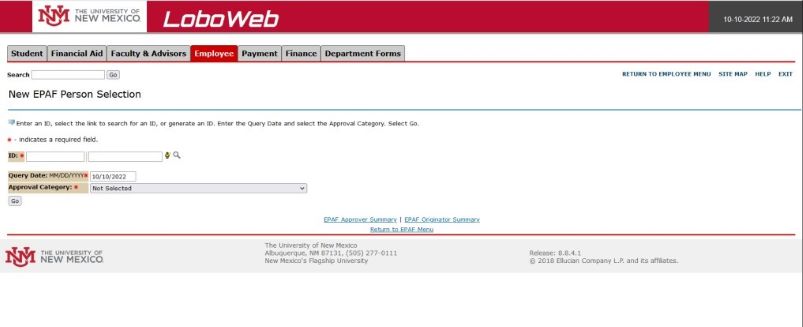
5. The new EPAF screen will appear and all fields will be blank.
6. Enter the employee Banner ID, hit tab, and change the query date to the 1st of the month. Select "Labor Distribution Change HSC/Main Unrestricted in the Approval Category field.
7. Hit Go.
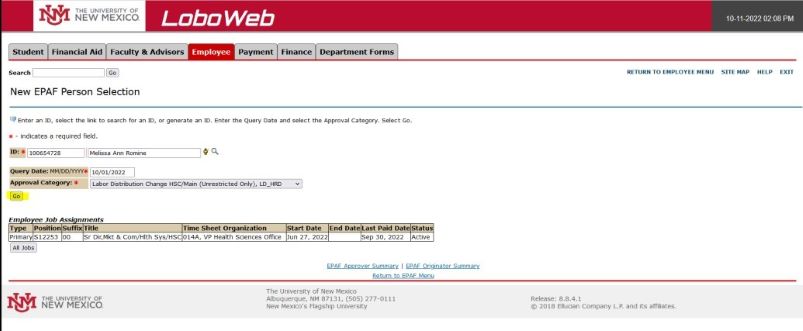
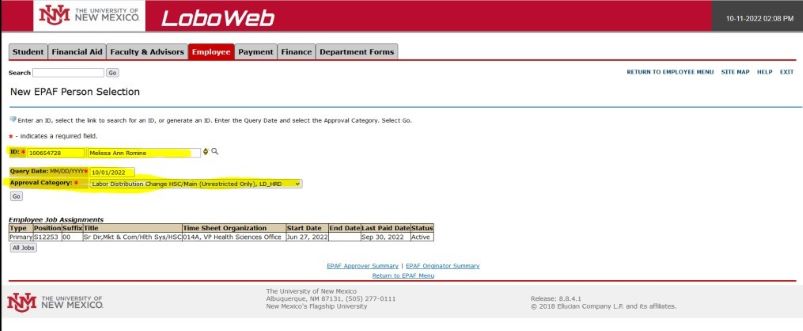
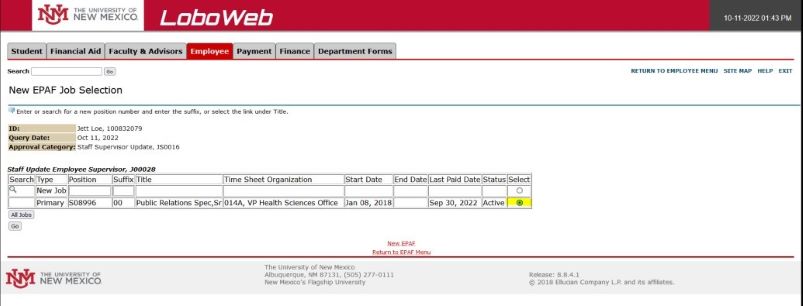
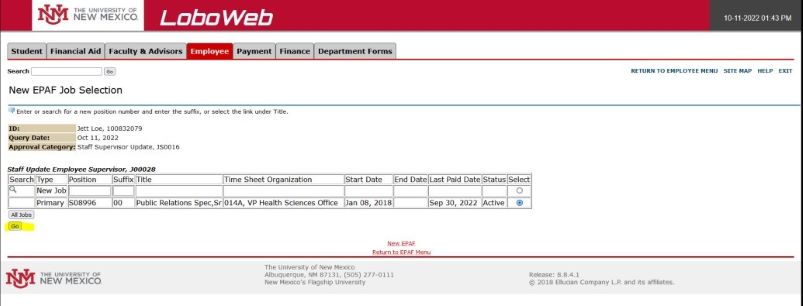
8. Select the employee's primary job and hit Go.
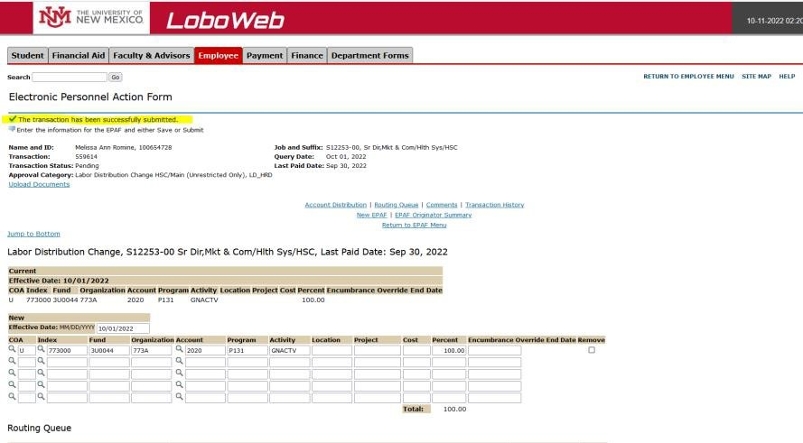
9. The Action Form screen, where changes will be entered, appears next. This screen will list the current index/account code(s) for the employee's salary.
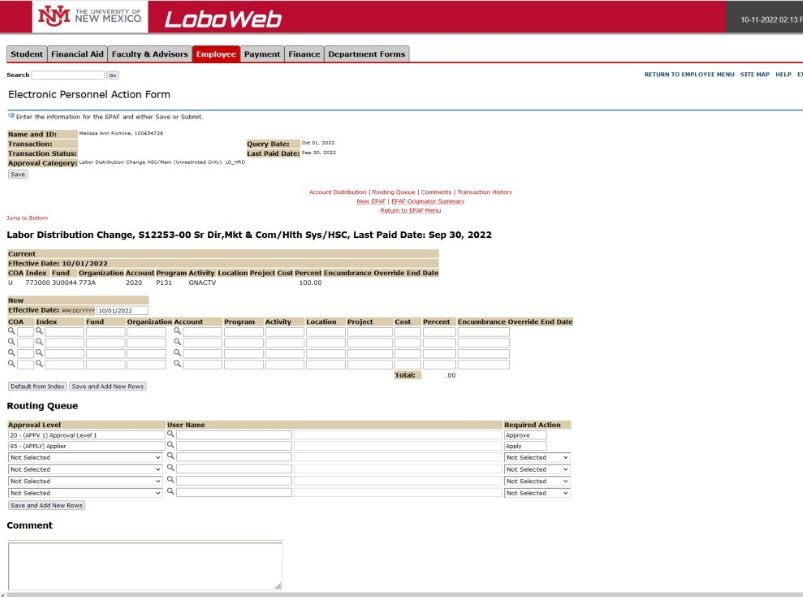
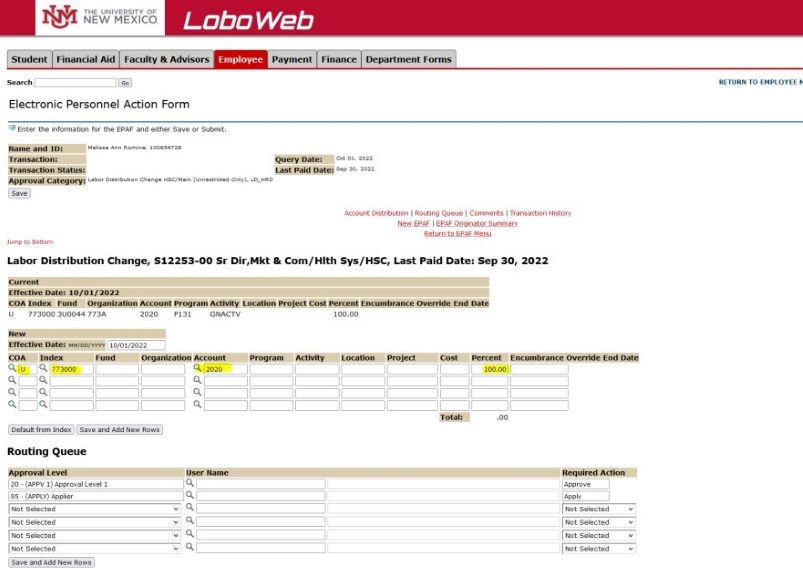
10. In the Labor Distribution Change section confirm that the effective date is the date you want the change to be effective.
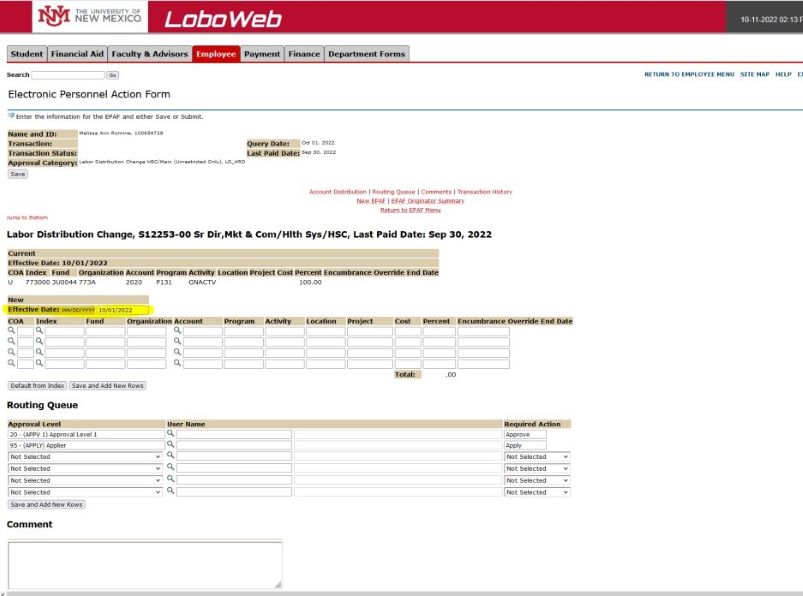
11. Enter "U" in COA. Enter the new index and account code (e.g., 2020). Then enter the percent of the salary that should post to that index. Some employee's salaries are split between numerous indices. Note: Percentage total must be 100.
12. Enter names in the approval routing que if needed. Then select the applier.
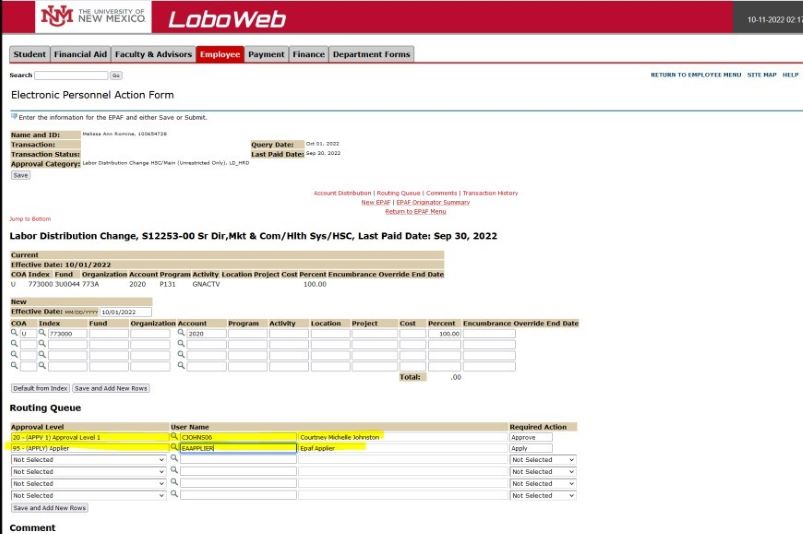
13. Enter a comment that states the reason for the redistribution. This is required.
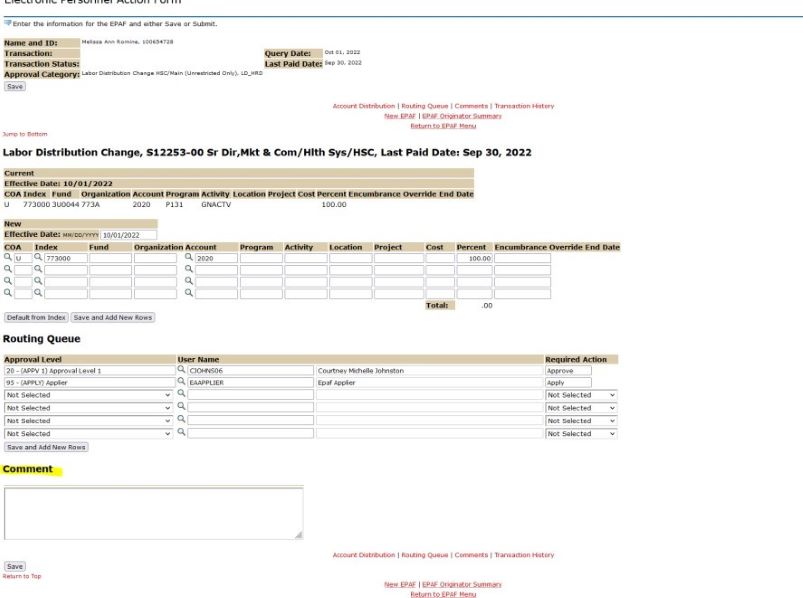
14. Hit Save.
15. Once the screen saves, hit "Submit" at the top or the bottom.

16. Ensure that the transaction has successfully submitted. A message to this effect will show near the top of the screen.
17. Exit the screen.
